C
You are using an out of date browser. It may not display this or other websites correctly.
You should upgrade or use an alternative browser.
You should upgrade or use an alternative browser.
What's the smallest Win 7 version that anyone has compiled?
- Thread starter videobruce
- Start date
how do you remove winsxs?
You need to disable Recommended and Servicing Stack compatibility and uncheck the component.


Last edited:
I forgot that Recommended compatibility also needs to be unchecked. I edited my post.
Clanger I don't know what DisableProtections does I have never tested it but with me NTLite "removes" WinSxS without even touching it. It does not completely remove the folder but it does remove most of it and the folder size is around 40 MB. I believe some files need to be kept.

Clanger I don't know what DisableProtections does I have never tested it but with me NTLite "removes" WinSxS without even touching it. It does not completely remove the folder but it does remove most of it and the folder size is around 40 MB. I believe some files need to be kept.
C
Clanger
Guest
its basically the last line of protection against removals, set to True you can remove everything. ive been setting it to true since my heavy removal days, great for testing possible new removals.
") from the name I figured it would do this but as I've never tested it I wasn't sure.
from the name I figured it would do this but as I've never tested it I wasn't sure.
C
Clanger
Guest
only use it on images and live TEST installs, never on your main system.

Q
Qommonsense
Guest
I have a 684mb install.wim file of a 64Bit Windows 7 Ultimate I run my benches on. It has drivers integrated as well. Fully updated before stripping.
C
Clanger
Guest
whats the actual installation size without pagefile hibernation and system restore?
That's pretty good! Can you post the preset here?I have a 684mb install.wim file of a 64Bit Windows 7 Ultimate I run my benches on. It has drivers integrated as well. Fully updated before stripping.
When I do that it gives me an error saying Ntlite needs it to modify components.You need to disable Recommended and Servicing Stack compatibility and uncheck the component.
Q
Qommonsense
Guest
Unfortunately, I didn't save it. Could I just load the wim file back up in NTLite and generate a new preset? What I particularly like about it is I run it in dual boot with Win 10 on a machine with Secure Boot enabled, no problem.That's pretty good! Can you post the preset here?
Q
Qommonsense
Guest
Q
Qommonsense
Guest
Typically, I apply the image to a formatted partition using dism.exe in Windows or WinPE, then use bcdboot to add the partition to the boot menu. Using this method is fast, and circumvents all the setup boot hassles. Of course, you'd need to integrate video drivers first. So, assuming your wim file is on Drive C, and you've created say a formatted 20GB partition on the same drive with assigned letter D, you open the command window, with administrative privileges, and type:
dism /Apply-Image /ImageFile:C:\install.wim /Index:1 /ApplyDir :\
:\
When that completes, you type
bcdboot D:\Windows (This will change your boot menu to the classic black & white menu, with Windows 7 as the 1st option.)
To revert to the Windows 10 menu, type:
bcdboot C:\Windows
You can use this method to quickly install any wim file, skipping the long setup media boot process. All you need to do is know the index number of the image you want to apply.
dism /Apply-Image /ImageFile:C:\install.wim /Index:1 /ApplyDir
:\When that completes, you type
bcdboot D:\Windows (This will change your boot menu to the classic black & white menu, with Windows 7 as the 1st option.)
To revert to the Windows 10 menu, type:
bcdboot C:\Windows
You can use this method to quickly install any wim file, skipping the long setup media boot process. All you need to do is know the index number of the image you want to apply.
Last edited by a moderator:
Thanks I'll give this a shot.
I found a few files. The final resultant preset I generated is labeled W7ULTx64.xml
Or you can use WinNTSetupTypically, I apply the image to a formatted partition using dism.exe in Windows or WinPE, then use bcdboot to add the partition to the boot menu. Using this method is fast, and circumvents all the setup boot hassles. Of course, you'd need to integrate video drivers first. So, assuming your wim file is on Drive C, and you've created say a formatted 20GB partition on the same drive with assigned letter D, you open the command window, with administrative privileges, and type:
dism /Apply-Image /ImageFile:C:\install.wim /Index:1 /ApplyDir
When that completes, you type
bcdboot D:\Windows (This will change your boot menu to the classic black & white menu, with Windows 7 as the 1st option.)
To revert to the Windows 10 menu, type:
bcdboot C:\Windows
You can use this method to quickly install any wim file, skipping the long setup media boot process. All you need to do is know the index number of the image you want to apply.
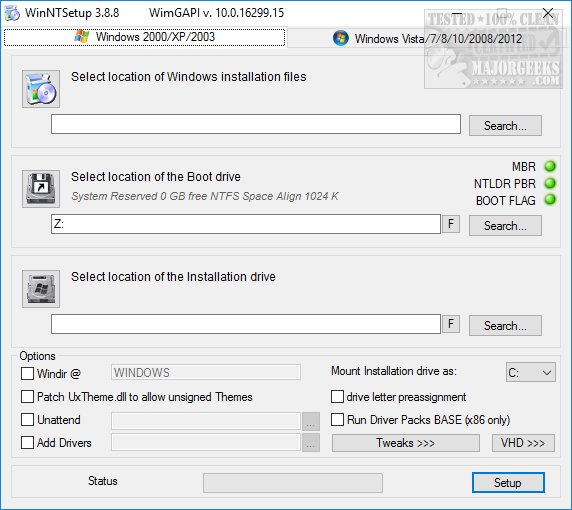
Download WinNTSetup 32-Bit 5.4.2 - MajorGeeks
WinNTSetup allows you to customize your Windows before you install it primarily for mass deployment. Overall, WinNTSetup is excellent for anyone who needs to mass-deploy any version of Windows saving time and applying a few standard tweaks.
m.majorgeeks.com